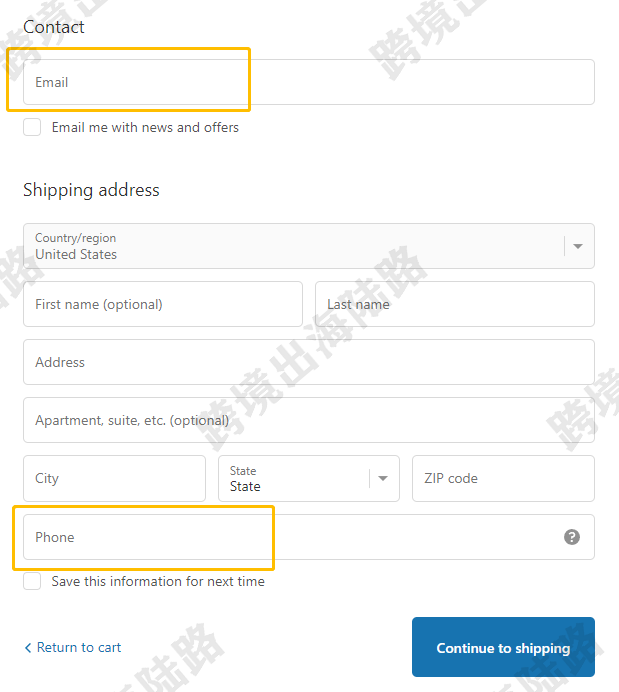
当顾客加车之后,或我们加车之后测试的时候,在到达发起结账页面(如下图),有两处设置是我们商家容易忽略修改的。
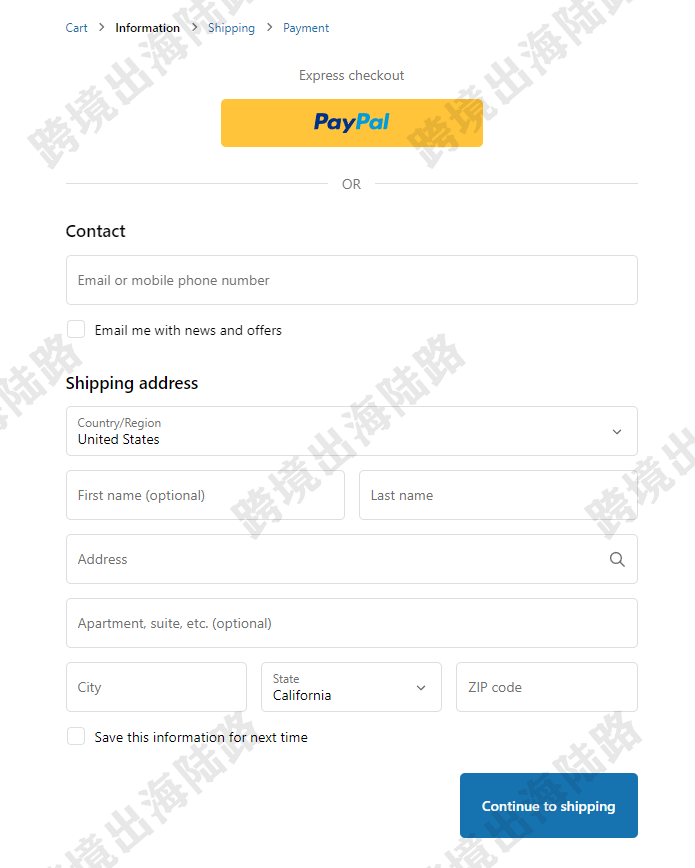
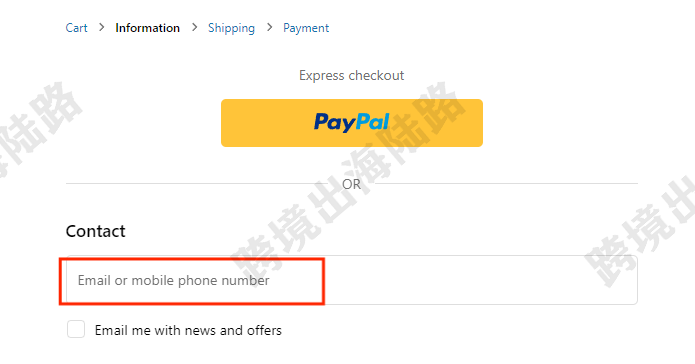
其中一处是Contact部分要求顾客填写的是Email or mobile phone number
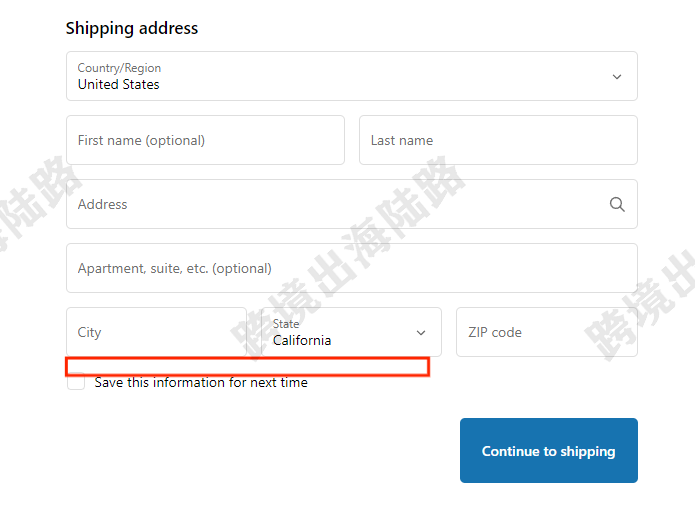
另一处是Shipping address没有phone number
这么设置有什么缺点呢?假如顾客在Contact部分填写的是Email or mobile phone number,注意这里只能填写一个邮箱或电话号码。
如果顾客填写了Email,那顾客下单,快递发出后,快递员如果对收货地址有疑问或需要联系顾客时,无法通过电话号码联系顾客,很容易造成快递未能妥投。
如果顾客填写了mobile phone number,没有顾客的Email,那么不利于我们以后的邮件营销。
所以Checkouts页面,我们怎么才能让顾客同时填写Email和mobile phone number呢?
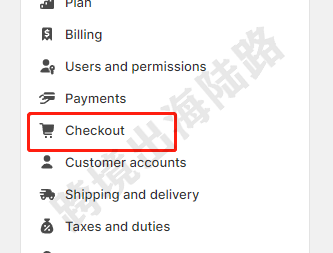
1.打开并登录Shopify商家后台

2.点击左下角Settings

3.点击Checkout
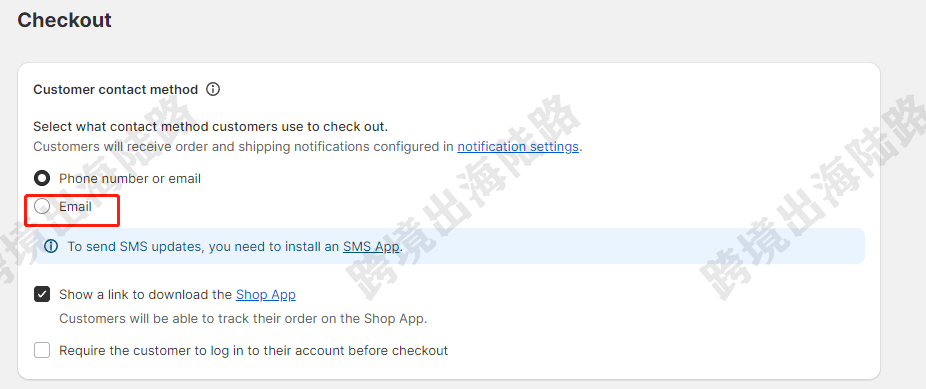
4.在Customer contact method处的Select what contact method customers use to check out勾选Email
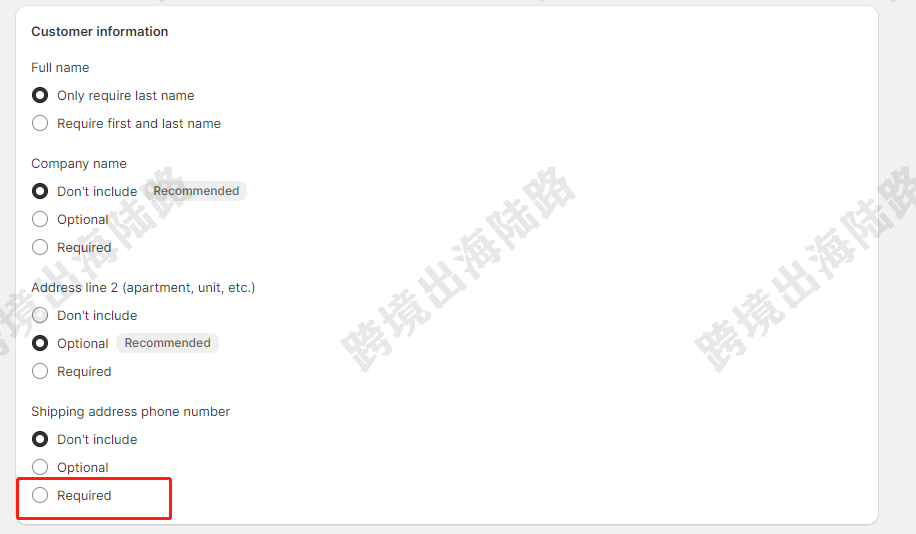
5.然后往下滑动鼠标,在Customer information处的Shipping address phone number勾选Required
6.点击Save进行保存
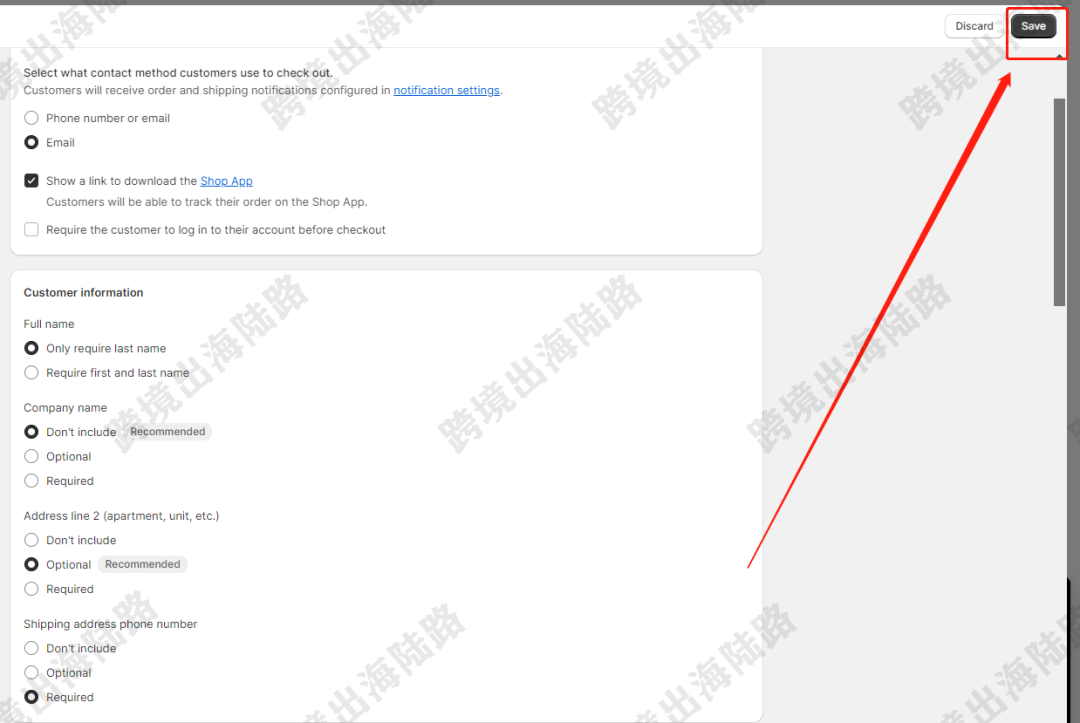
7.回到前端的Checkouts页面部分,可以看到Contact部分要求顾客填写的是Email,而Shipping address处也有要求客户填写Phone number。这样对于物品妥投和商家邮件营销都是有利的。